Beginners guide to install Nginx server
- 2024-08-24 (1 year ago) |
- Syed Shahzaib |
- Linux Guide
Introduction
Nginx, pronounced "Engine-X," is an open-source web server that is highly recommended due to its usage as either a reverse proxy server, HTTP cache server, or as an HTTP server due to its flexible behavior. It is free and compatible with most of the Linux distributions. In this tutorial I will use AlmaLinux 9, previously known as CentOS, as we proceed.
Pre-Requisite
- Basic Linux knowledge.
- SSH access via terminal.
Step 1 - SSH into server
Log in to your web server using PuTTY on Windows or Terminal on Mac/Linux. Since I am using Windows, I will proceed with PuTTY.
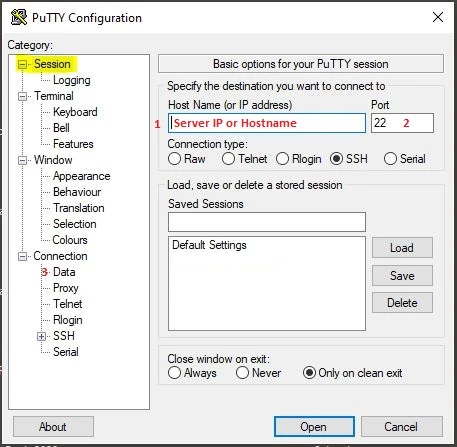
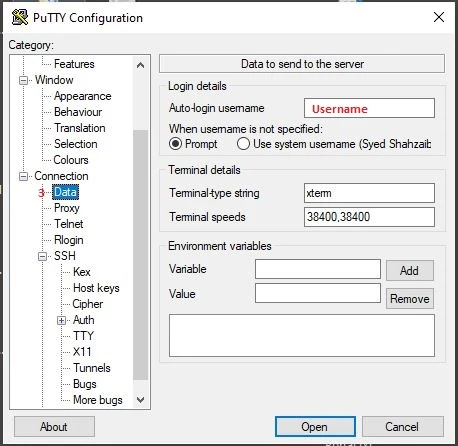
Once you have completed all the steps shown in the images above. Click the Open button to start the PuTTY session.
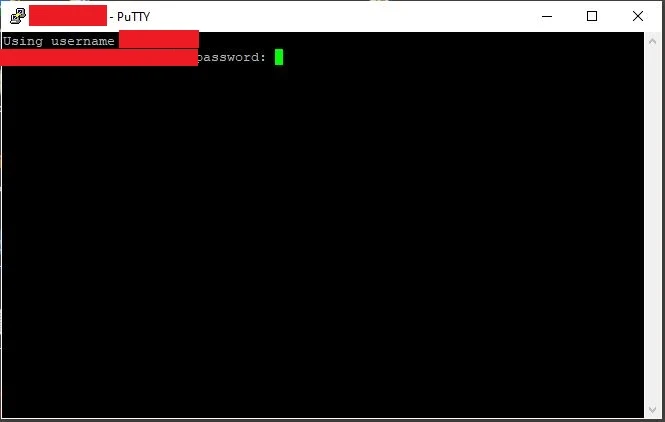
After clicking 'Open,' you will see a screen where you can enter your password. Type the password of your server and hit enter.
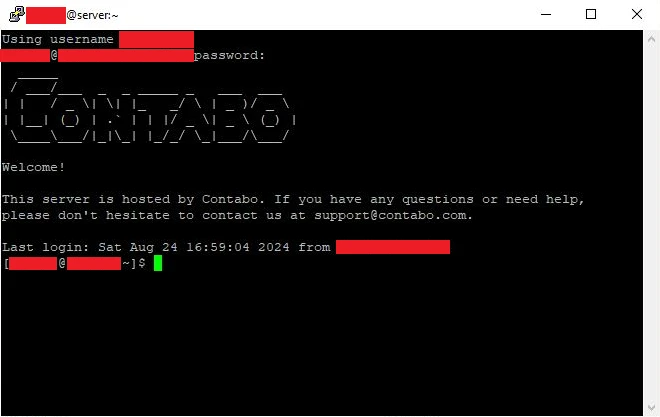
Once you are logged in, you will see output like this in terminal/console.
Note: If your VPS is configured with a Private Key, you can attach it in PuTTY by navigating to Connection -> SSH -> Auth. Do not expand; just click. You will see an option to attach the Private Key file from your local system.
Step 2 - Installing NGINX server
Run the command: sudo dnf update to perform updates.
Run the command: sudo dnf install epel-release . This is the package that contain the repository configuration files for the EPEL repository. EPEL is a high-quality repository of open-source packages that maintain and run the Fedora project for RHEL, CentOS, and other compatible distributions.
Run the command: sudo dnf install nginx -y to start installing nginx server.
Run the command: sudo systemctl enable nginx to enable nginx as a service in OS.
Run the command: sudo systemctl start nginx to start nginx server.
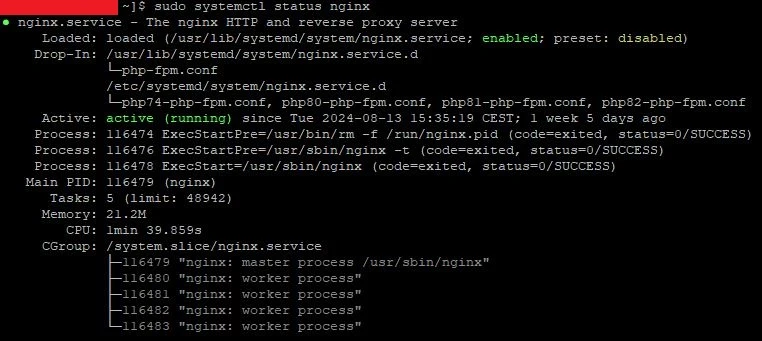
Run the command: sudo systemctl status nginx to see the status of nginx server. The output should look like this:
Optionally, run the command: sudo systemctl restart nginx to fully restart the nginx server. Or, run: sudo systemctl reload nginx to reload the Nginx configuration file..
Note: It is highly recommended to test your Nginx configuration file after making changes. Run sudo nginx -t to prevent breaking your server.
Hopefully, this article was helpful to you in setting up the Nginx Server on your Linux system. Stay tuned for more exciting content and tutorials.


